


ShopSite Tip – Product Options Hints & Tips
ShopSite has a powerful product options feature, especially after the addition of Advanced Options, but sometimes users don’t know it’s there or find it confusing when first trying it out. In this post we’re going to highlight the feature and point out a few hints and tips for first time users.
Basic Ordering Options
ShopSite calls product options “Ordering Options” which you will see on a product’s Edit Product Info screen. Scroll down to that section and there will be a “Pull-down Menus” field which is the primary control for this feature.
In that box you can enter your options which will appear as a pull-down menu for the customer. In our example below we’ve added some colors the customer can choose from:

TIP – Add a header line such as “Select Color” as the first option and put “;n” after it. This will allow the customer to easily see what the drop-down is for and the “;n” forces them to make a selection. (So they can’t leave it set to “Select Color”)
TIP – If an option changes the price, such as how the Red option adds $5 to the price, you can display the additional cost in the option name. Anything before the “;” shows to the customer so you can see we added “(+$5.00)” to the option name. This way the customer knows that selecting Red costs $5 more before they even add it to their cart.
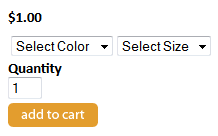
You can easily have more than 1 drop-down for your customers to choose from. To add more you would just separate them by blank lines in the “Pull-down Menus” field. For example if we prompt for color and size it could look like this:
Select Color;n
Red (+$5.00);+5
Blue
Green

Select Size;n
Small
Medium
Large
That will create 2 pull-down menus on the page:
For additional details and samples of other ways options can change the price of the product please see ShopSite’s documentation here:
http://www.shopsite.com/help/11.2/en-US/sc/pro/ordering.options.html
Advanced Options
With Advanced Options your options gain a variety of additional features:
- Unique SKU per option
- Options can modify both price and weight
- Inventory tracking per option
- Unique product image for each option
Advanced Options are enabled by clicking the “Advanced Options” button you see below the “Pull-down Menus” field. You’ll see the button in the first screenshot above.
TIP: Before enabling Advanced Options remove any pricing comments you added to your options, such as the (+$5.00) in our Red option above. Advanced Option names can not be edited and if you convert with the price in your option name but want to change the price later you’ll have to delete the option and add it back to change the name.
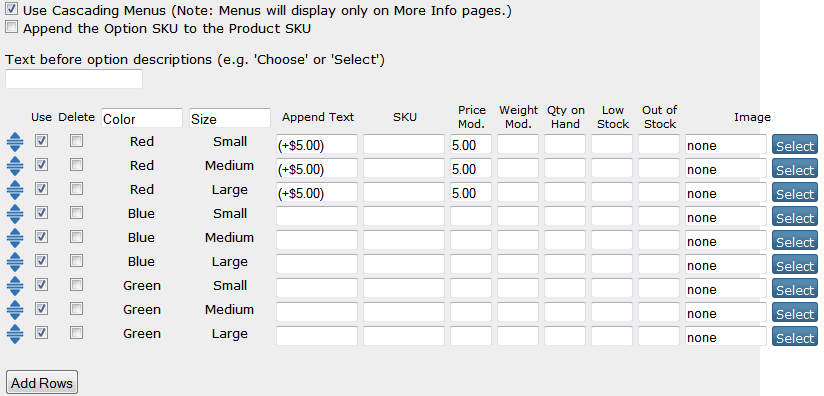
Here are our options above after converting to Advanced options and changing a couple of settings:
Click For Full Size
TIP: We removed the ($+5.00) from our Red option and then after enabling Advanced Options we added that text to the “Append Text” field. This is how you can display extra information about an option to the customer without having to edit the option name.
TIP: The “Use Cascading Menus” setting will create multiple drop-downs where the users selects from 1 at a time when making their choices. The 2nd (or 3rd/4th) drop-downs are then built dynamically off the selections of the prior drop-downs. So if a certain combination is not offered it will not appear in the list. Try enabling this for your options to see how it changes the display.
TIP: If you had any header lines (ex: “Select Color;n”) in the “Pull-down Menus” field they will be inserted into the text fields above the option values. Since “Select” will be automatically displayed (unless you fill in the “Text before option descriptions” field with something else) you can remove “Select” from the header field. You can see we have just “Color” and “Size” in our fields here.
For additional details and descriptions of all the advanced options features please see ShopSite’s documentation here:
http://www.shopsite.com/help/11.2/en-US/sc/pro/advanced.ordering.options.html
…
As you can see the options feature is very powerful, but also easy to configure. When in doubt – just add a test product and play with Ordering Options to become more familiar with how it works. Then you’ll be ready to go when you want to start using it for your products.
Looking for a web host that understands ecommerce and business hosting?
Check us out today!


This is great! I had figured out the drop downs, but love that this forces customers to make a choice before checking out! Thank you so much for the TIPS!
Glad you liked it and that it helped make your site better.