


ShopSite Tip – Ask a question about this product
Customers ask A LOT of questions. Have you ever had someone email you with a question about a product but they didn’t tell you which one? It happens! In this post we’ll show you how to easily add a small contact form to your More Info pages which a customer can use to ask a question about that product and it will automatically insert the product details.
What It Does
This process will create a link on your product More Info pages such as “Ask A Question About This Product” which when clicked will display a contact form. See the example below for how the link can look:
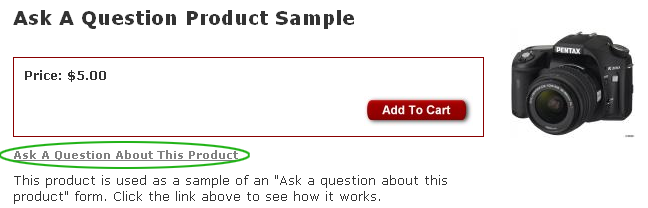
Once you click the link a form will appear, prompting the customer for their name, email address, and their question:
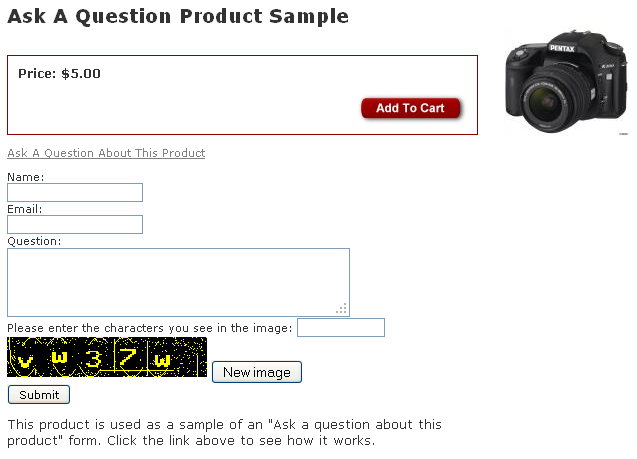
Hidden behind the scenes is the product name, sku, and the URL of the page where the customer filled out the form. All of this information will be provided in an email to the store owner when the customer submits the form.
The Email
Once the form is submitted a basic email with all of the details is sent to the store owner. Here is a sample of what the email can look like:
From: Test Guy [mailto:test@lexiconn.com]
Sent: Thursday, June 13, 2013 11:35 AM
To: sales@your-domain.com
Subject: Question about: Radio Flyer Wagon

email: test@lexiconn.com
realname: Test Guy
product_name: Radio Flyer Wagon
product_sku: wagon
product_url: http://shopsite-demo.lexiconn.com/ask-question-sample.html
question: Do you have this in Blue?
The Form
To process the form results we’re going to use formmail.php which is included with your hosting account here at LexiConn. Your account should already have formmail.php but if errors appear saying formmail.php can not be found please let us know.
On the Merchandising > Custom Templates > Includes screen, click “New Include”, enter a filename of “ask_question_form” and click Create.
Edit your new include file and replace it’s default code with the following:
<!-- Ask A Question About This Product -->
<script type="text/javascript">
 function showHide(obj) {
   var div = document.getElementById(obj);
   if (div.style.display == 'none') {
     div.style.display = '';
   }
   else {
     div.style.display = 'none';
   }
 }
</script>
<script language="javascript" type="text/javascript">
var nReload = 5;

function NewVerifyImage()
{
    if (nReload <= 2)
        if (nReload <= 0)
        {
            alert("Sorry, too many reloads.");
            return;
        }
        else
            alert("Only " + nReload + " more reloads are allowed");
    nReload--;

        //
        // This code now works in both IE and FireFox
        //
    var         e_img;

    e_img = document.getElementById("vimg");
    if (e_img)
                //
                // FireFox attempts to "optimize" by not reloading
                // the image if the URL value doesn't actually change.
                // So, we make it change by adding a different
                // count parameter for each reload.
                //
        e_img.setAttribute("src",e_img.src+'?count='+nReload);
}
// -->
</script>

<p><a href="#" onclick="showHide('hidden_div'); return false;"><strong>Ask A Question About This Product</strong></a></p>

<div id="hidden_div" style="display: none;">
<form action="http://www.your-domain.com/scripts/formmail.php" method="post">
    <input type="hidden" name="recipients" value="sales@your-domain.com">
    <input type="hidden" name="good_url" value="http://www.your-domain.com/ask-question-thanks.html">
    <input type="hidden" name="required" value="imgverify:<em>The text shown in the image" />

    <script type="text/javascript">
    var str="[-- PRODUCT.Name JS_ENCODE --]";
    document.write ("<input type=\"hidden\" name=\"subject\" value=\"Question about: " + str.replace("\"","''") + "\">");
    </script>

    <script type="text/javascript">
    var str="[-- PRODUCT.Name JS_ENCODE --]";
    document.write ("<input type=\"hidden\" name=\"product_name\" value=\"" + str.replace("\"","''") + "\">");
    </script>

    <script type="text/javascript">
    var str="[-- PRODUCT.SKU JS_ENCODE --]";
    document.write ("<input type=\"hidden\" name=\"product_sku\" value=\"" + str.replace("\"","''") + "\">");
    </script>

    <script type="text/javascript">
    document.write ("<input type=\"hidden\" name=\"product_url\" value=\"" + document.URL + "\">");
    </script>

Name:<br />
<input type="text" name="realname"><br />
Email:<br />
<input type="text" name="email"><br />
Question:<br />
<textarea name="question" cols="40" rows="2"></textarea><br />
Please enter the characters you see in the image: <input type="text" size="12" name="imgverify"><br />
<img src="http://www.your-domain.com/scripts/verifyimg.php" alt="Image verification" name="vimg" id="vimg"> <button onclick="NewVerifyImage(); return false;">New image</button><br />
<input type="hidden" name="note" value="NOTE: Any double quote characters in the product name or SKU above have been replaced by 2 single quotes: ''">
<input type="submit" name="submit" value="Submit">

</form>
</div>
This include file contains all the form code and javascript which displays the form. It also creates the link to make it appear or hide when needed. In the code there are a few lines which you must update in your include template in order to make the form work and customize it for your site:
Update these lines to your domain name:
<form action=”http://www.your-domain.com/scripts/formmail.php” method=”post”>
<img src=”http://www.your-domain.com/scripts/verifyimg.php” alt=”Image verification” name=”vimg” id=”vimg”>
Update this line to your email address:
<input type=”hidden” name=”recipients” value=”sales@your-domain.com”>
Update this line to your “thank you” page:
<input type=”hidden” name=”good_url” value=”http://www.your-domain.com/ask-question-thanks.html”>
(This is just a regular page on your site the customer will be forwarded to after they will out the form. You could display a “thank you” message and let the customer know you will reply to their question soon.)
Once those changes are in place the next step is to test the form. To test this on a product, before going live on all your products, make a copy of your current product template. Then in your new product template enter the following code where you want the link to appear:
[– INCLUDE ask_question_form PROCESS –]
This will insert the include template so it will appear on your page. Assign a product or a test product to the new product template and the link should then appear. Feel free to update the code to change things such as the “Ask A Question About This Product” text or the form itself.
TIP: Be sure that you do not insert this within existing form code on the page as overlapping forms will not work. For example it needs to be outside the existing order form code on the page.
For a sample of how the form looks, we have a test copy here:
http://shopsite-demo.lexiconn.com/ask-question-sample.html
Note: Our test form will not actually submit the email, it’s only to display how the link works and what the form can look like.
…
That’s all there is to it! One include template with a little bit of code and you can have a small contact form for all of your products.
Looking for a web host that understands ecommerce and business hosting?
Check us out today!


This is great. An added bonus would just be a modal window or alert on the page indicating that the mail was submitted, rather than dragging them to a new “Thank You” page.