


Google Shopping – Advanced Bidding With “Auto Targets”
All products are not created equal! Or, more precisely stated, not all products deliver above average profit margins. For this reason, it’s important to take control of your “Product Listing Ads” (PLA’s).
During the initial set up of your Merchant Center account, Google created a PLA campaign for you in Adwords. The daily budget you submitted to Merchant Center was applied to this campaign.
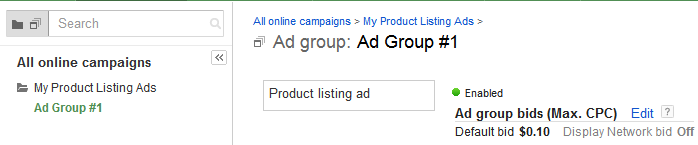
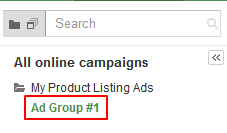
The PLA campaign, by default, contains a single “Ad” group (e.g. “Ad Group #1″).
(click image to enlarge)
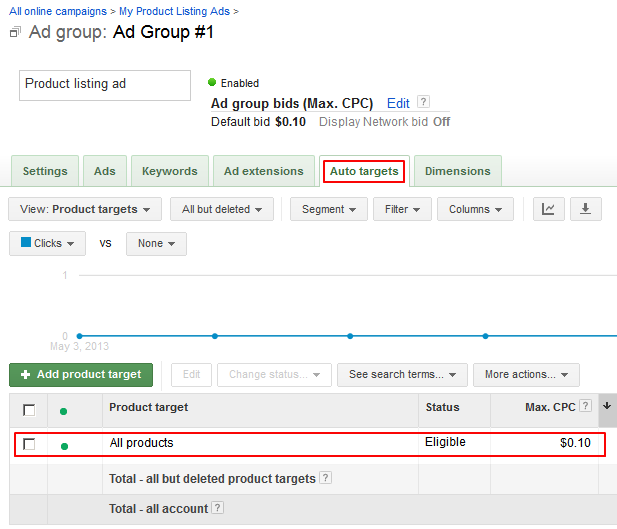
Within the default Ad group, Google has set the Auto Target value to “all products”. The “max CPC”, set during account creation, is 100% applied to the default Auto Target. Basically, all “active” products from your feed are given similar display consideration by Google. Meaning that products with very little profit margin will have the same (or similar) rate of display as higher margin products. Additionally, they will use the same “max CPC” setting to determine positioning. While this may be perfectly fine for feeds with limited margin diversity, others will find it necessary to set up additional “Auto Targets” – insuring their featured products are presented with the greatest frequency and in the highest possible positions.
Configuring the Product Type attribute in Shopsite
Adwords provides several options for defining Auto Targets, including: id, product type, brand, condition, labels and grouping. For our purposes, we’ll be focusing on product type.
If you’re using ShopSite as your ecommerce solution, and you currently submit a feed to Google, it’s quite easy to update the Product Type attribute. First, we’ll verify that Shopsite is configured correctly.
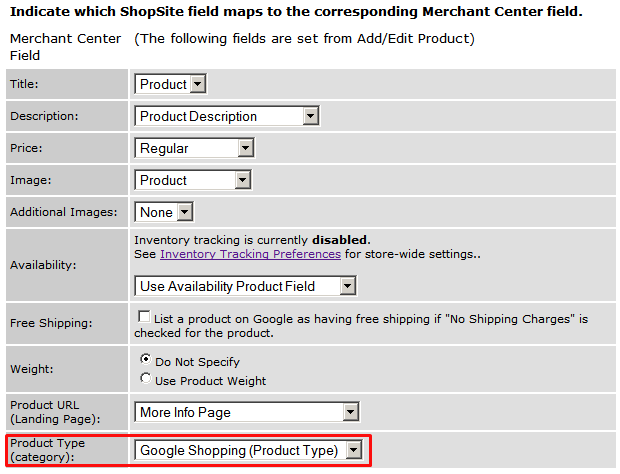
Merchandising Tools > Google Services > Google Shopping/Merchant Center > Configuration
(click image to enlarge)
The default mapping for Product Type is “Google Shopping (Product Type)”, which is assigned in Products > Edit Product Info. There’s no need to change the default value, as we’ll be using this field to store our Auto Target values.
Products > Edit Product Info

(click image to enlarge)
Merchants are free to assign any value they see fit to the Product Type field. Keeping in mind that the goal is to group products in a manner that allows you to fine tune display frequency and positioning of your products.
Consider the following examples:
Merchant “A” has assigned products in three groups, based solely on profit margin.
products-tier1 (highest margin – highest “max CPC”)
products-tier2 (average margin – lower “max CPC”)
products-tier3 (lowest margin – lowest “max CPC”)
Merchant “B” has some seasonal products and elects to organize using six Product Type groupings. Similar to above, the tiers are grouped based on margin, however seasonal products are grouped separately.
products-tier1, products-tier2, products-tier3
seasonal-tier1, seasonal-tier2, seasonal-tier3
By placing the seasonal products in their own groups, the merchant can now control the timing and bidding for those Ads (independently of non-seasonal products). The merchant can choose to “pause” seasonal product targets when out-of-season, then re-activate at the appropriate time. Or, keep them active and simply lower the “max CPC”. This also negates the need to continuously add/remove seasonal products from the Google Shopping feed.
Once you have a plan for assigning product types, you’ll need to update the Product Type values for each of your products in Products > Edit Product Info. This can be accomplished by individual updates, PowerEdit (Mgr/Pro) or Product Upload (Pro Only)
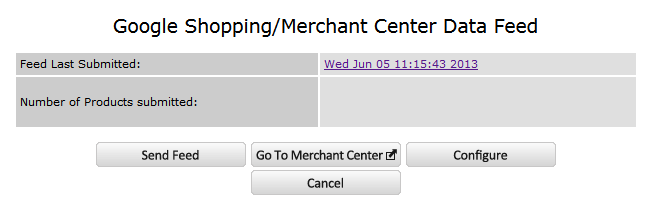
When updates are complete, you can resend your Google Shopping Feed.
Merchandising Tools > Google Services > Google Shopping/Merchant Center
(click image to enlarge)
Creating Product Type Auto-Targets in Adwords
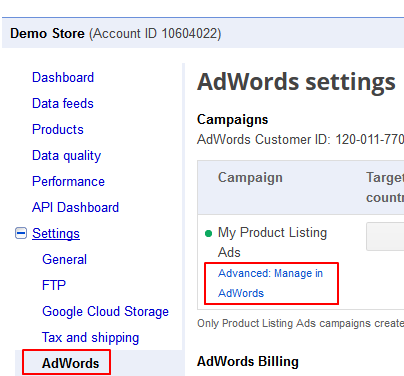
1. Login to Merchant Center
2. Select Settings > Adwords > “Advanced: Manage in Adwords”
(click image to enlarge)
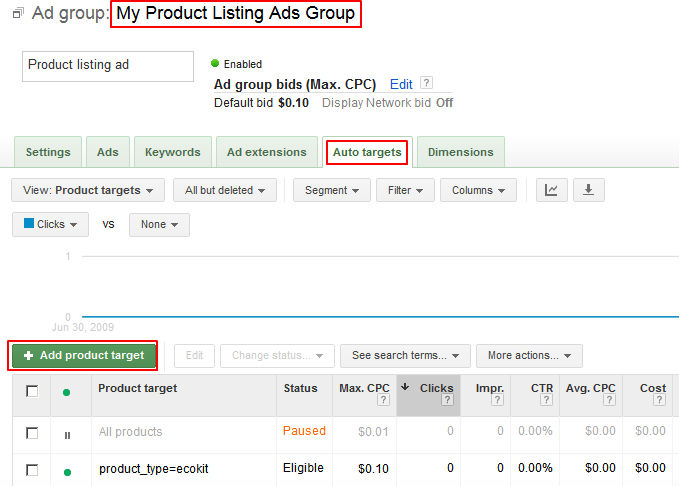
3. Select your PLA campaign (left side navigation menu) > Product Listing Ads Group
(click image to enlarge)
4. Select the Auto Targets tab
(click image to enlarge)
5. Click “+ Add product target” > Add a group of products
(click image to enlarge)
6. Choose “product type” from the drop-down menu and enter a value which matches what you’ve assigned in ShopSite (Products -> Edit Product Info -> “Google Product Type”). The value you enter here must precisely match the feed!
7. Click Validate to ensure that the above value matches available products from your Google Shopping feed.
Note: All products are reviewed by Google prior to being activated. For a product to be “available”, it must be in “active” status. You can verify the status by searching for your products in Merchant Center by ID (SKU).
8. Save
9. Set “Max CPC”
10. Save
Repeat steps 5-10 for each of your “Product Type” groups!
That’s it! Your new PLA “Auto Targets” are ready to roll out… Remember to keep those product feed(s) up-to-date 


